Friday, June 28, 2013

Kim Score :: Happy Summer Lollipop Treat

Hello all! This is Kim Score from www.paperpunchaddiction.com.  I found these cute little lollypops at my local Target store and instantly I knew what I wanted to make!   The PKSC-18 June 2013 stamp set goes perfectly with this idea.


Following are the step by step instructions.  It's really very easy to make these fun sucker covers.  Don't have a sucker? Try adding a clear window to the opening and filling with small candies instead.

Supplies:
Peachy Keen June 2013 Stamp of the Month set
Regal Rose card stock
Tangerine Tango card stock
Certainly Celery card stock
Shimmery White card stock
Big Scallop Circle spellbinders dies
Circle and Petite Circle spellbinders dies
Big Shot (or other die cutter)
Modern Label punch
3/8" Circle punch
Basic Black ink
Peach Parfait marker
Pumpkin Pie marker
Tangerine Tango marker
Dazzling Diamonds glitter and glue pen
Dimensionals
Score Board

Step 1:
Cut a 10-1/4" x 5-1/2" piece of Regal Rose card stock.  Score at 3/4", 4-3/4", 5-1/2", 9-1/2" on the long side.  Score at 3/4", 4-3/4" on the short side. Sharpen the folds.  Clip the corners off.  Cut on the short score lines at the center.  On the back side of the card stock, mark at the center of each end on the flap.  Punch a 3/8" circle on the mark.


Step 2
Using the Big Scallop Circle die set from Spellbinders, select the 2nd from the outside.  Die cut a scallop circle from a piece of Tangerine Tango card stock.  Glue onto the center of of one side as shown.


Step 3
Using the Petite Circle dies set from Spellbinders, select the 2nd from the outside.  Center it on the scallop circle and die cut through all layers.


Step 4
Cut a piece of 3-1/2" x 3-1/2" Certainly Celery card stock.  Glue onto back of empty circle as shown.


Step 5
Using the circle dies from Spellbinders, select the 3rd die from the outside.  Center in the circle and die cut through all layers.  You should have a narrow green border on the inside of the window.  Add sticky strip or other adhesive on the flaps.  Adhere the flaps on each end together, aligning the punch holes.  Slip the sucker stick into the hole from the side opening of the box.  Close the sides of the box and tape in place.

Stamp the starfish on Shimmery White card stock with black in.  Color with markers and cut out.  Attach to the center of sucker with a dimensional.  Stamp the greeting onto certainly celery card stock and punch out with modern label punch.  Attach to front with dimensional.  Attach the ribbon that came with the sucker onto the stick.


Wednesday, June 26, 2013

Jeanne Streiff :: VACATION!

Hi! Jeanne Here today with an easy card using stamps from PKSC-18 June 2013 and
PK-211 Tropical Floral.

I love how the flowers look as a tone on tone border!


Have a great day! 
Jeanne

Tuesday, June 25, 2013

Thia Gielow :: Christmas Countdown


Helllllllloooooo! Thia from Blue Moon Creation here, with my last post as Guest Designer. <sniff, sniff>
I have had so much fun as the Guest Designer for June. Thank you so much for this opportunity! 

Okay, so who is ready for Christmas in July? Lol.  I am, with this PEACHY Christmas Countdown Tree! 

The concept of this is like an advent calendar. (Only no chocolate/candy.) The way we plan on using it is on the first night in December, an ornament is placed on the peg labeled 1. On the second night, an ornament on the peg labeled 2. Third night, peg labeled 3, and so on...until the night of the 24th, when the last ornament is placed on the tree. There are 4 pegs on the bottom portion of the tree that don't have numbers associated with them. This is where our stockings will hang, waiting for Santa. (Our fireplace is covered with shelving until our little ones are older.) And yes, that is Tinkerbell at the top of the tree, keeping track of all the PEACHY MAGIC!

 Elves having fun playing in the tree.

Stamp sets used to create this Peachy Christmas Countdown Tree:
PK-159 Thinking of You Bear (find this HERE)
PK-15 Oh By Golly! (find this HERE)
PKSC-11 November 2012 (find this HERE)
PKSC-13 January 2013 (find this HERE)

Lots of time is needed for making this tree, so if you start now,
you can have one made in time for this Christmas!
I had my dear sweet hubby cut out the tree and drill
holes for the pegs. Glued pegs in, applied a few coats of spray paint and let that dry.
I used memento ink to stamp the images and numbers. I let the images sit for weeks
before coloring them with my Copic markers. After coloring with my markers,
I let them sit a few more weeks. During this time, I got the base of the tree ready.
Using my cuttlebug and my woodgrain embossing folder, I ran some brown paper through
to cover the tree trunk. Then I wrapped the paper "gifts" around and decorated with paper "ribbons and bows". (Bows were made using a paper punch and hole punch.)
I used Mod Podge to glue the "gifts" on, and once it dried, I applied a few coats of Mod Podge
on top to seal it and make it stronger.
I then paper punched the ovals to attach the numbers to and glued the numbers onto
the ovals with my Tombow glue, then let dry a few days.
Now that all of my pieces have cured, I was ready to place them onto the tree.
Using a thin coat of Mod Podge, I stuck the numbers and images
onto the tree. Let that set for a week and then applied a thin coat to the top of the images.
A week later, another thin coat over them to make sure they were sealed in.
The reason for letting it sit between stages is to make sure everything cures properly.


Stuffed bears on top of the presents


And now it's time to say good-bye.
I have had so much fun sharing my projects with you!
Don't forget to stop by my blog HERE for your chance at some PEACHY blog CANDY!
I hope to see you there!

Monday, June 24, 2013

Melissa Haas :: Summer Tag Decor

Hello everyone! This is Melissa with a project for you today! I am loving the summer stamps and new face assortments.  I have this frame in my dinning room that I switch out with seasonal 3 by 5 inch tags. This is my summer themed frame:

Sentiments from PKSC-18
and PK-163 Veggie Sentiments ONE
Sun and watermelon's faces PK-1300 Sweet & Innocent Face Assortment.
Sandcastle and Beach Ball PK-180 Erkle and Merkle Face Assortment

Faces PK-1300 Sweet & Innocent Face Assortment
"You're Hot!" PK-163 Veggie Sentiments ONE
"Happy Summer" PKSC-18
I love how Peachy Keen Stamps add so much character to your die cuts.   Here is a tip for you- To get crisp white eyes on dark paper, I stamp my face on white paper and then carefully cut the eyes out.  Stamp on your die cut your selected face but cover with the white paper eyes.  This was done on the pink Popsicle.  This also works well with paper that is textured or has a finish on the top, like the beach ball on this project.

Thanks for visiting today. More information about this project is at my blog, HERE.

Friday, June 21, 2013

Cindy Beland :: Fun In The Sun Layout

Hello Peachy friends!!!
This is Cindy from Cindy's Scraptastic Designs, I have a project to share
 with you today. I made a layout using the new Peachy Keen Stamps of the month set
 and last months add on set !!! They go together perfectly.
 I just love these pictures of my kids at the beach, my little Scotty looks so cute!
 I miss my little guy, he is gone with the school for 3 days :( and I am sick inside and if I
could I would call he every minute!!!! 
My images of the PK kids are inside a pocket, you can pull them off the page!!!


Supplies I Used for my Layout:
Copic Markers
DCWV- Photoreal Seasons Stack
 PKSC-07 July 2012 (for the banner)


Peachy Keen Stamps - Stamp Kit of the Month Club
Kit subscriptions are a recurring monthly payment that is billed and shipped
on the 6th of each month All subcribers to either of our kits must check out with our
secure online credit card server. Each month, you will receive one 8.5x11"
sheet of Peachy Keen Stamps that are provided at a $15 discount to subscribers only.
Kit Cost: $24.95 + $5 flat rate shipping in the U.S. (this kit will retail for $39.99 without any
discount for non-kit club members) That is a savings of $180.00 per year or $90.00 per six
month subscription!

Hope you enjoy my project, have a great weekend Peachy friends!:)

Wednesday, June 19, 2013

Tanya Adams :: Happy Summer Step Card

Hi there Peachy friends!
This is Tanya from Nonna's Craft Corner and I'm so happy that you stopped by today!  How's the temperature at your house?  It has been climbing steadily here in southeast Alabama, getting hotter and more humid everyday.  Sure makes me dream of a tropical vacation on a sandy beach with the sea breezes blowing through my hair.  But....I really don't see that happening anytime soon.  So, I created this fun, tropical step card to sit on my craft table.  I can crank up the AC, turn on some "beach" music, look at my card and dream.......


Are you feeling those ocean breezes yet?


The adorable little Hula girl and guitar is from the new Rock a Hula stamp set PK-1254).
All of the other fun images are from the June release  PKSC-18) .

Here's a couple of close ups for you....


I colored all the cute images with my Copic Markers and used lots of glitter on my sand.
The waves, sun and sky were created with my Copic Air Brush System.


These stamps just make me happy!  The images are perfect for any summer/beach project you may be working on.  Just take a look at all the cuteness in this set.....

Fun, huh?
Ok, that's about it for me today!  Thanks again for stopping by today - I'll be seeing you soon!

Tanya

Tuesday, June 18, 2013

Thia Gielow :: Peachy Jewelery


Hellooooooooooo again PEACHY PALS! Thia from Blue Moon Creation here again, with my next post as this month's Guest Designer. I hope you have enjoyed my projects so far, and are ready for
today's fun project...

BEVELED BOTTLE CAP CHARMS!!!

If you are like me, and loooove these cute PEACHY PALS,
why not get some materials to make the ever so ADORABLE small stamps into something
that you can take along with you...jewelry, key chains, or hair accessories!!?!

I am currently into fairies and gardening, so this PEACHY PAL is my favorite:

The stamp sets that I used to create these pieces were:

PK-121 Mini Fairies and Girl Gnomes (found HERE)
Pk-754 Critters Set A Medium (Small set works best, which you can find HERE)

To find out more about how I created these, please stop by my blog, Blue Moon Creation.
To celebrate my Guest Designer position, I'm giving away some PEACHY BLOG CANDY at the end of my term over on my blog, so come visit me and don't miss out!
Details found on my blog post for Peachy Keen HERE

I'm so sad that I only have one more post as Guest Designer, but I want you to know,
I saved the BEST for last!!! Don't forget to come visit again NEXT TUESDAY, you don't want to miss it!
(Especially if...you love Christmas as much as I do!)

With that being said, have a very PEACHY week! Until next time...


Monday, June 17, 2013

Vivienne Holden :: I Missed Your Birthday

 Hi Everyone,
Viv here with a little card that hopefully,
 will let whoever didn't get their birthday card, see the funny side. 

Do you think it'll work? Yeah... sure to! LOL
 Stamps used
PKSC-12 

(I put the banner on dimensionals for bit more definition).
The candles and banner were coloured with Copic markers.
The paper is Docrafts 'Spots and Stripes.

I think those little guys show how sorry they are to have forgotten someone's birthday.
(Looks like they are blaming the middle candle)! Ha Ha.

You should really check out the Peachy Keen Stamp Club sets.
you can see them HERE.
(They are amazing value. There must be a million stamps in each set)! 
OK, there isn't a million, but it's not far off!
Well, I hope you liked my cheeky card today.
Thanks for stopping by!


Friday, June 14, 2013

Amy Crockett :: Happy Frogger's Day!

Hello everyone!! This is Amy from Scrapping Mommy here to share a fun card I created for Father's Day.....it is just around the corner. My dad really loves fishing and the Fishin' Frog stamp set helped me make the perfect card for him.

I used my Copic markers to color the image and added some white pen accents.  The background paper is embossed with my Cuttlebug and then inked a little to help show the dimension.  I added some eyelets to thread some twine through and tied it to the card.  Here is a closer look:

I hope that this post has helped to get you inspired to create a fun card for the man in your life.

Hugs,
Amy

Wednesday, June 12, 2013

Emily Kluender :: Fun In The Sun Step Card

Hi Peachy Friends, Emily here!! Today, I have a step card I created with the new Peachy Keen June stamp releases.


I just love how I could create this little beach scene using the new PK stamps!!
The sentiment, beach ball, fish, starfish, octopus, sandcastle, and sun face all come from the new PKSC-18 June 2013 stamp of the month set. This is such a cute set and has so many different stamps to create a great summer project. 

The small starfish and beach ball, were stamped and colored in with Copic Markers.

The octopus, large star fish, and sand castle were stamped and paper pieced. 


If you would like more information on how to sign up for the PK Stamp of the Month Club please click here. It is such a great deal and Kathy comes up with the cutest stamp sets each month. 

PKSC-18 Peachy Keen Stamps Club Recurring Billing


The little surfer boy's face comes from the new PK-1320 In the Garden Face Assortment. I also used this face set on the middle fish. 

How cute are these faces?! I just love them!!


This little surfer boy comes from SVG Cutting Files: Surfer Corey.


On the surf board, I stamped on the flowers using PK-211 Tropical Floral. I then put clear embossing powder on top to make it stand out more. 


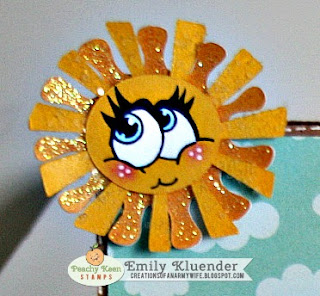
The sun with the adorable face from PKSC-18 June 2013 comes from Treasure Box Designs: Sand Box Collection. 


For more information on my step card please visit my blog.

Have a peachy day and happy stamping!!


P.S.
Don't forget about the rockin' sale that is still going on over at the Peachy Keen Stamp website!!  You won't want to miss out on these amazing new stamps at great prices!!

New Releases are 20% off for one week only!

Tuesday, June 11, 2013

Thia Gielow :: It's Birthday Time!

Hey there PEACHY Pals! Thia from Blue Moon Creation with my next post as this months Guest Designer. As promised, I have a project (Birthday Card) that I made using stamps from SOTM from April 2012.

Since I love to paper piece, I gave this cute clock a pink party hat that I had colored in using my Copic markers. To color the clock, I used T0 and T2 and then colored over that with the clear Copic Glitter Pen. I used a few Nestabilities that I cut the sides off of, and adorned the scallop with some black gemstones. I used my white Gelly Roll Pen for the faux stitching on the black banners and black circle background. Added some hot pink bakers twine to match the party hat to finish it off. Okay, so who noticed the time? It's time FOUR your BIRTHDAY....CUTE? CLEVER? BOTH?

Have I mentioned that I am addicted to PEACHY KEEN STAMPS? No? Well, I am. So much so, that I sometimes find the need to take their cuteness along with me. So...Come back next Tuesday and see how I accomplish this with jewelry I made. Yup, you aren't seeing things...yes, JEWELRY!!! Until then, have a PEACHY week!

Oh, and don't forget to stop by my blog, Blue Moon Creation. In celebration of getting to be a Guest Designer, I have some PEACHY prizes I'm going to give away at the end of the month over on my blog to a few PEACHY friends. Hope to see you there and back here next week!