Showing posts with label Faceless Fruit. Show all posts

Friday, August 30, 2013

Nikki Foraker :: Thanks A Melon

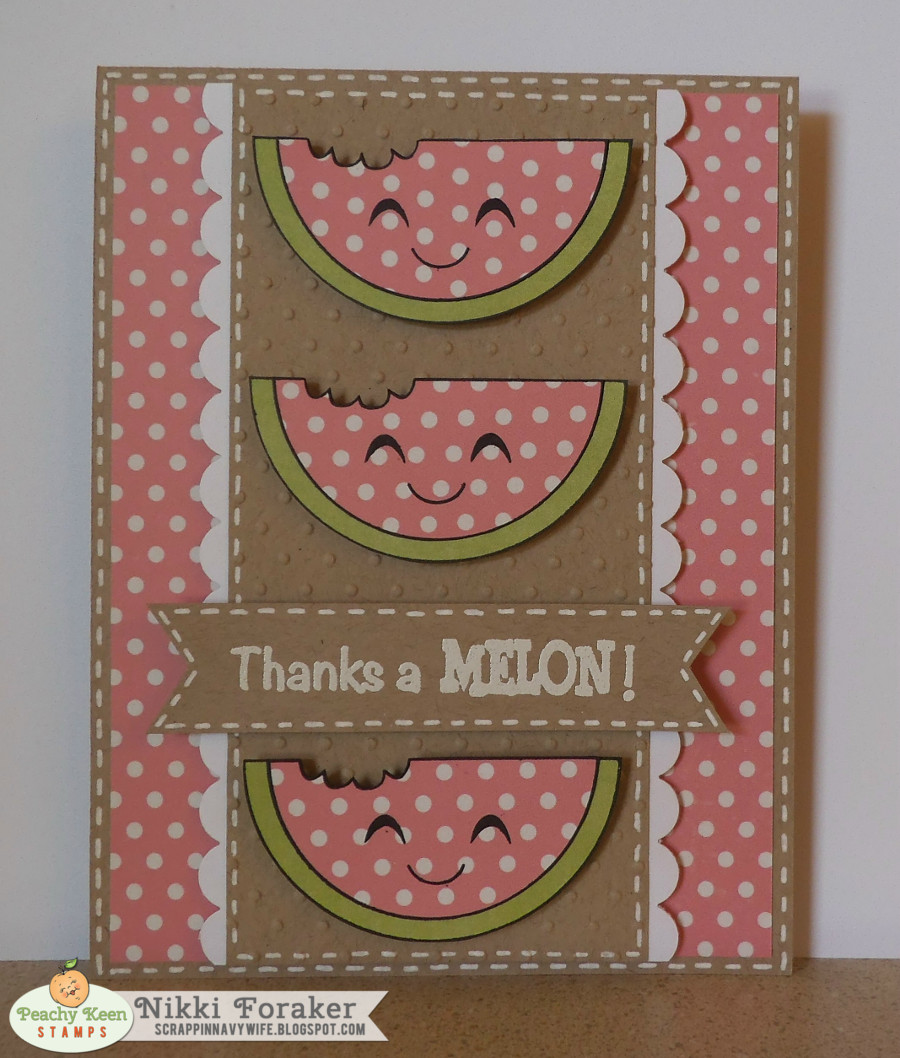
Greetings, Peachy Pals! Nikki here with a card on this fine Friday. :) I used the super duper fabulous Faceless Fruit set to stamp and paper piece these cute watermelons. Their adorable faces are from the July 2013 set. 
To finish off this card, I white embossed the greeting from the Fruit Sentiments Two set. 

I hope you have a PEACH-TASTIC weekend!

♥ Nikki ♥

Tuesday, February 26, 2013

Shar Hoff :: Cute Fruit!


Well it had to end sometime and sadly this is my last day guesting on the Peachy Blog, but I have to say, it has been so much fun getting reacquainted with all my peachy stamps, acquiring new ones, and playing along with the PKS team. I hope you've enjoyed my projects and will continue to follow my crafty adventures on my blog at Scrapendipity Studio. Thank you so much to the PKS team and fans for all the love. It has been a blast!! ♥

For my last project, I've used the faceless fruit, one of my very first Peachy sets, with the fruits sentiments (two) set. I used various paper scraps in my stash for this simple card, one of my favorite ways to recycle, and some yellow hemp twine.

Here is a closer view of my friends. ;) They're so corny, aren't they?! LOL In addition to the fruits and fruit sentiments, I used the cornies face assortment, and for the lemon's pucker face, funshine face parts.

Thanks again for the chance to share with other peachy fans and for all the love! It's been PEACHY and I've enjoyed every minute. ♥
 

Friday, February 22, 2013

Amber Kroening :: 2 Cute Cards

Hey guys!  Amber here, from Bella Rose Cards.  One of my favorite ways to use my stamps is to create backgrounds.  It's fool proof and it lets your images take center stage.  To create this first card I used Faceless Fruit, Fruit Sentiments Two, & Erkle and Merkle Face Assortment. I simply stamped the fruit, colored them with Copics, and adhered onto a black card base.  I finished it off with a sentiment strip in the corner.


The only stamp set I used on this card was Eye Sentiments.  I stamped the eye until my entire card was covered.  I like to start in the center and work my way out.  Then I colored my eyes with Copic markers.  I stamped my sentiment on a strip of white cardstock, and used a heart punch to create a banner. I did the same thing with the orange strip, and then attached it to my card with foam adhesive. 


Fun right?  I hope I helped give you some ideas on how to use your stamps to create backgrounds  Thanks for stopping by! Have a fabulous day!

Monday, January 28, 2013

Amy Crockett ::

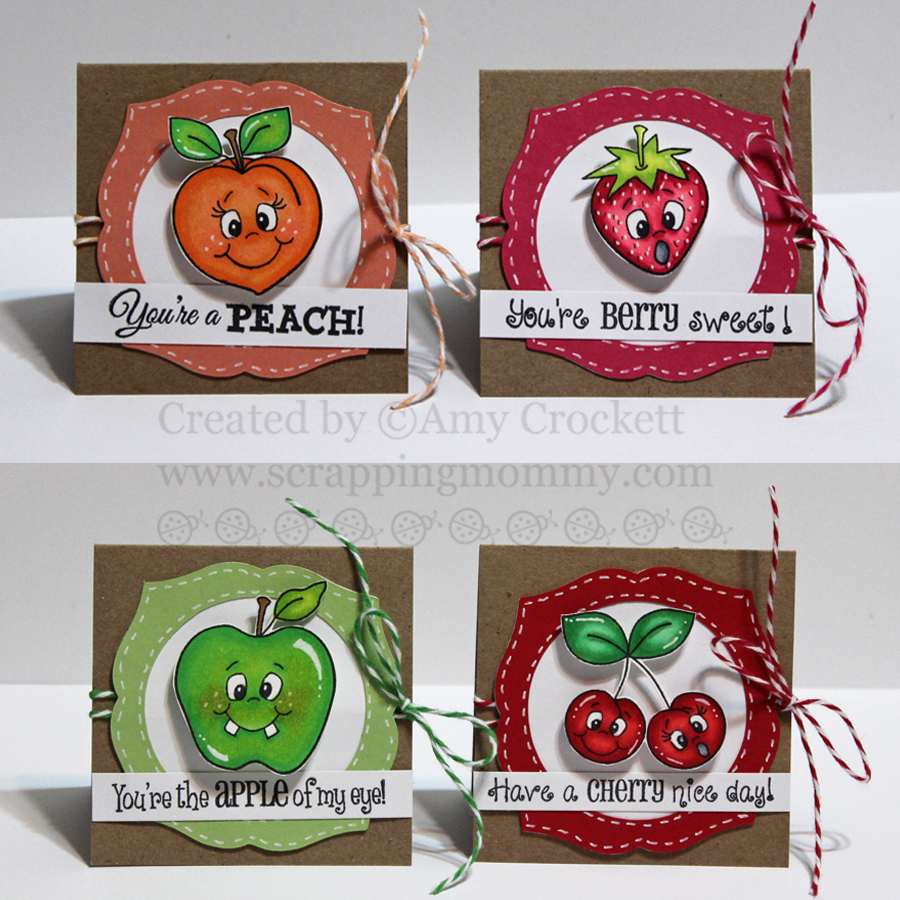
Hello fruity friends!!  This is Amy from Scrapping Mommy and I have a set of four mini cards to share with you today that are super fruity.  I love having some mini cards around to give with a quick gift or thank you.  I used the newest Fruit Sentiments One.

Each card measures 3 x 3 and I used my Cricut machine to cut out the background frame.  The fruit are all stamped from the Faceless Fruit stamps and added some faces with The Cornies Assortment.  I colored the images with my Copic markers and then added some white pen details to the fruit as well as stitching around the edges with a white Gelly Roll pen.  To finish off the cards, I added some bakers twine from The Twinery.

I hope that these little cuties have cheered you up today!!

Hugs,
Amy

Friday, January 18, 2013

Nikki Foraker :: Have A Peach Of A Day!

Hiya Peachies! :) Nikki here with 2 cards today. For this first one I stamped the cutie peach from the Faceless Fruit set. I stamped it a few times on different patterned papers so I could paper piece it. The face is from the August 2012 set. I used my sakura stardust glitter pen to add sparkle the the glasses. You can see the sparkle here...
The greeting is from the fabulous new Fruits Sentiments One set. I stamped it and white heat embossed it. And here is the other card I made...
I cut out the adorable Tear Bear die. Then I gave teddy the cutest sad face ever from the new set called Teddy Bear Assortment. I stamped and paper pieced the kleenex box from the Bawlin Bunnies set. 
The greeting is from the new Get Well Bear set.  I also white heat embossed it. 

I hope your weekend is just PEACHY! :)

Nikki

Wednesday, September 26, 2012

Cristina Garcia :: Birthday Treat Bags

Hi Peachies,

It's Cristina from Crafting with Cristina.

Fall is upon us!

For many of us that means changing leaves, cooler weather and pumpkin patches. For me, it means my daughter is another year older.

This year she has decided that she wants to have a "Strawberry Shortcake" Birthday party and therefore I have been tasked to start the massive decorating process.

Then it hit me, THEMED ITEMS ARE EXPENSIVE. And with more than 3/4 of her preschool class attending. I needed to come up with some way to make affordable treat bags that would save me money and not be too time consuming, but still be very cute.

Enter my Peachy Keen Stamps and old fashioned ingenuity.


Untitled
Believe it or not, I used a few simple supplies to put these little treat bags together


Here is the quick step by Step

1. Take a Lunch Bag and Fold it in half
2. Using the Bottom Flap as a Guide Trim The bag to make it smaller.
3. Stamp the front of the Bag using PK-239 Faceless Fruit and Crumb Cake ink.
4. Fill your Bag with your Candies & Goodies
5.  Fold over the top of the paper bag, must like you would a lunch bag, NEATLY using your bone folder to crease it over as you go. This makes all the difference
5. Punch 2 holes equidistant from the sides in teh bag in the top flap of the bag
6. Thread some twine through the holes
7. Using Various Punches, assemble your Character Tag then punch a hole using a hole punch
8. Thread your twine through the Character tag and tie it off in a Bow
9. Stamp Your Thank You Sentiment from PK-562 Gnomegrown on a 1 inch strip some coordinating Pattern Paper and cut one side to a banner edge
10. Adhere to the front of your treat bag using Foam tape

There are plenty more specific details on my blog, but I hope this is just an great money saving inspiration on how to use your Peachy Keen Stamps.

I could also see something like this is a Halloween Theme using PK-130 Spider and WebJust Stamp the Spider Web all over your bag, creating the tag using the spider, with
 maybe some Halloween themed ribbon/twine and papers.

 Just another idea :)